Warning!
Pairing the Westpac Group pinpad with a system running Windows POS Ready 2009 is not supported.
Note!
In the event that your network details have changed (e.g. WiFi router replaced) or if the POS terminal that the pinpad was previously paired to is no longer available, you will need to complete the unpairing process from the pinpad.
Typically in these cases, the pinpad will show "Disconnected from POS #".
To complete the unpairing process from the pinpad, simply hold down the 3 and Enter buttons at the same time.
You will be prompted to enter the Merchant Password. If you don't know the password, please contact Westpac Group for more information.
After entering the Merchant Password and pressing Enter, a list of options will be displayed.
Select the number on the pinpad that corresponds to the option "Unpair Pinpad".
The unpairing process will be completed. If the WiFi details have changed, you will need to complete the step Connecting the Pinpad to your WiFi network.
Otherwise, you may return to the Pair with POS screen by pressing the "X" button on the pinpad until you reach a screen which shows a "Pair with POS" button at the bottom.
The pairing process can then be completed as below.
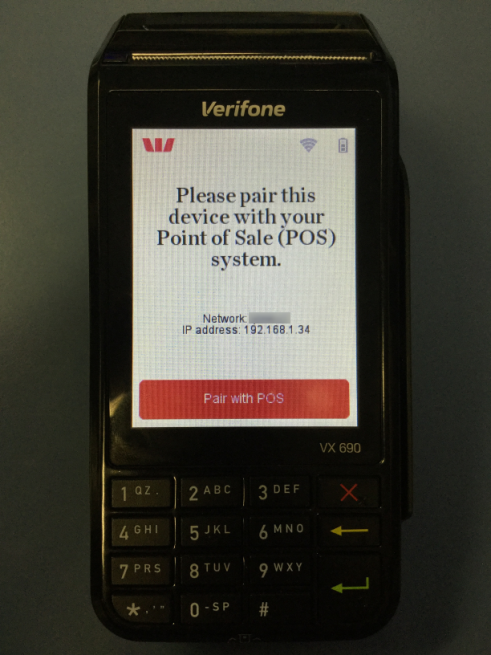
The Pinpad needs to display the pairing screen in order to pair with Idealpos.
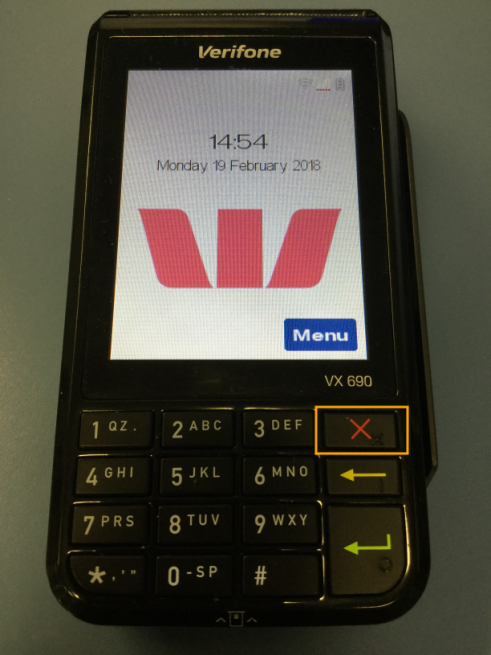
If the Pinpad screen displays the following screen or any other menu screens, keep pressing the red 'X' button on the Pinpad as illustrated below until you arrive at the Pair with POS screen.
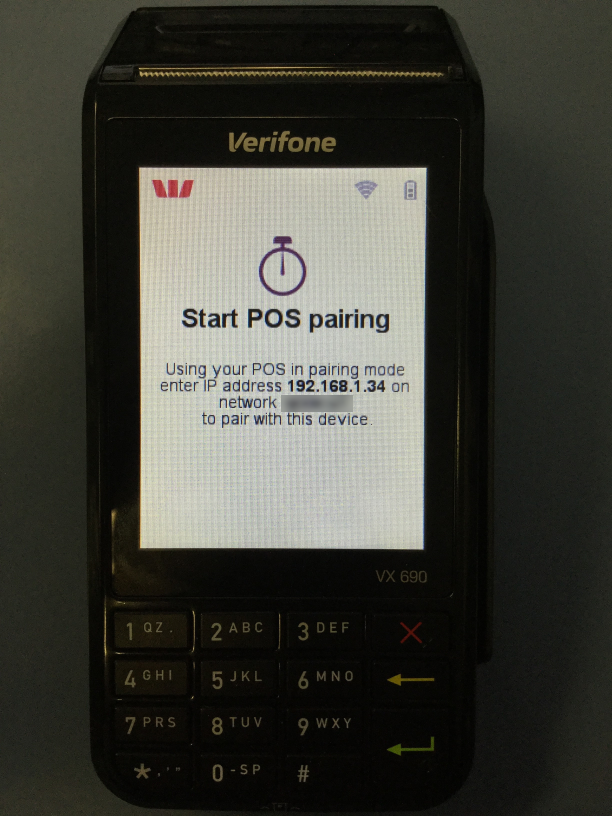
The pairing screen will show the name of the WiFi network as well as the IP address.
To pair the Pinpad with Idealpos, enter the POS ID into the POS ID field and enter the Pinpad's IP address into the Pairing field located at the bottom right corner of the EFTPOS Settings screen.
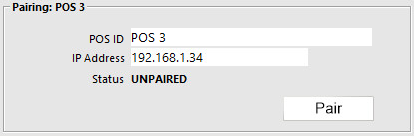
Then press the 'Pair' button.
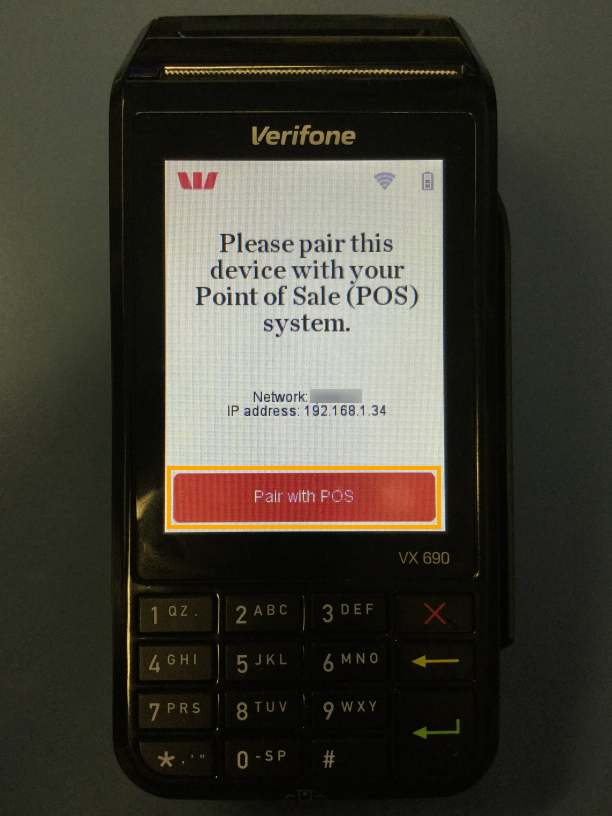
The following screen will appear.

On the Pinpad, press the 'Pair with POS' button.
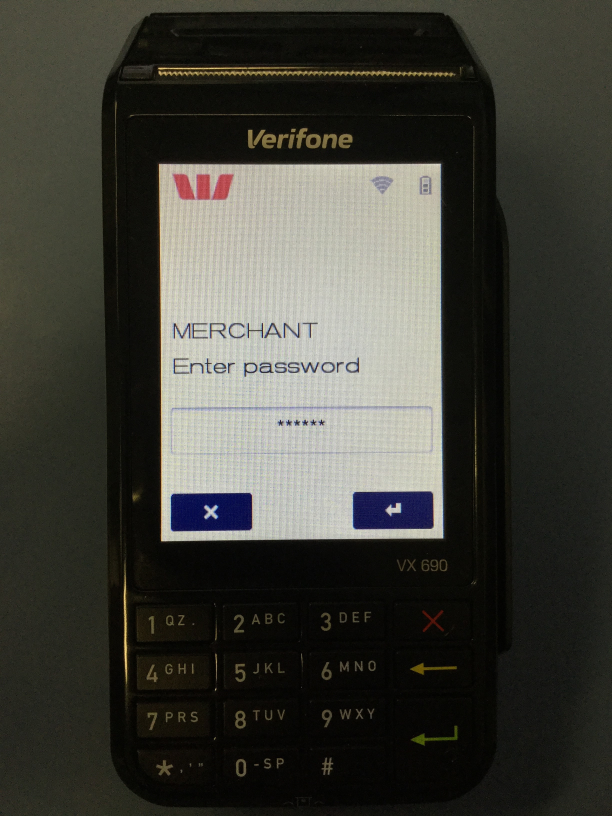
The Pinpad will then display the MERCHANT Enter password prompt.
Enter the password and press the Enter button.
The Pinpad will then display the Start POS pairing screen.
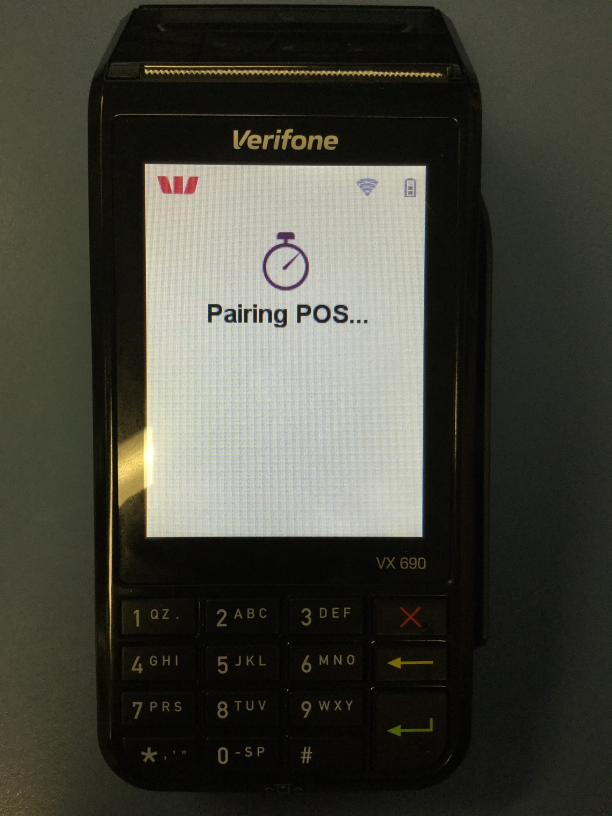
Now press the 'OK' button on the following screen.
The Pinpad will now pair with the POS terminal.
Once paired, the Pinpad will display a Please confirm pairing code message and Idealpos will display a confirmation message.
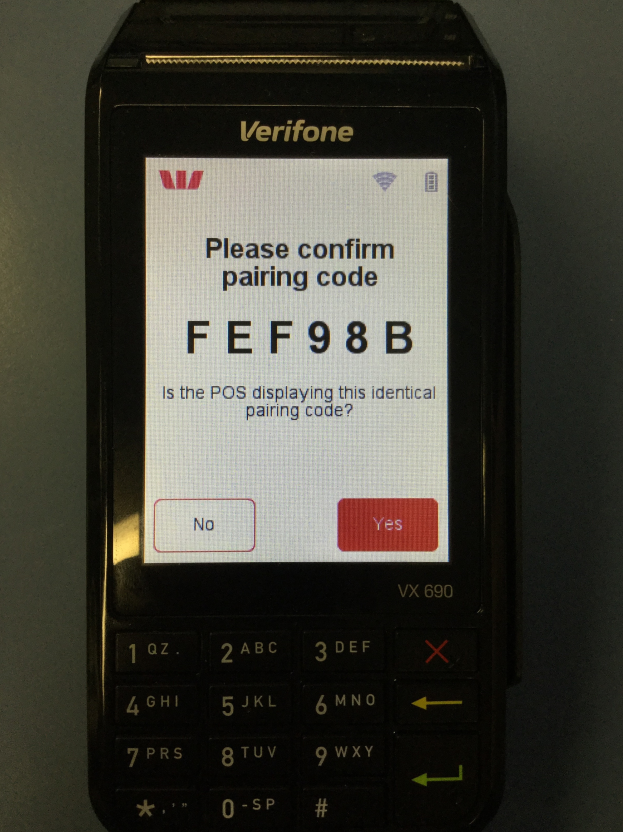

Press the 'Yes' button on the Pinpad first to confirm the pairing code matches the code that is displayed in Idealpos, then press the 'Yes' button in Idealpos.
Should the pairing code displayed on the POS terminal and the Pinpad not match, press the 'No' button. The pairing process will fail and you will need to complete the process again.
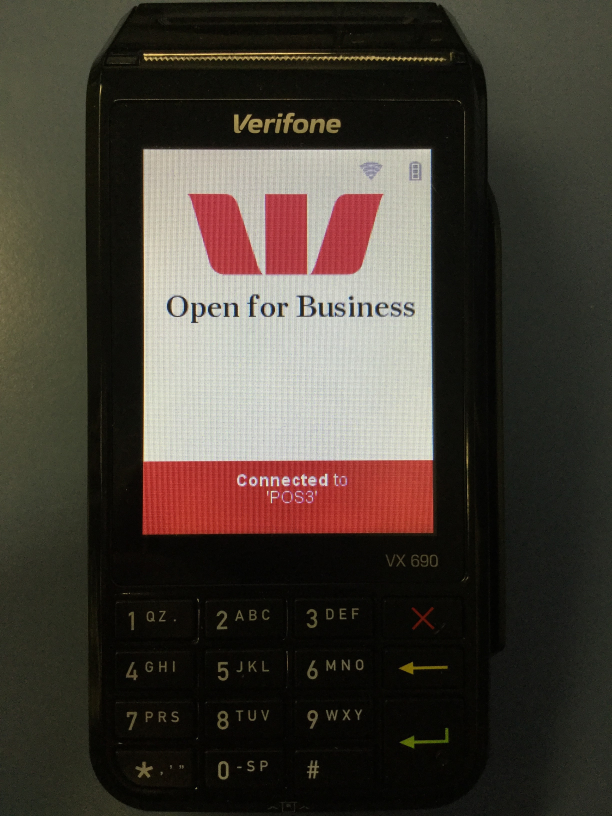
Once the pairing process has been successfully completed, the Pinpad will show a 'Connected to 'POS'' message, where 'POS3' in the below image will be substituted with the name and number of the POS terminal that the Pinpad has been connected to.
Idealpos will also show a Pairing Successful message.

Press OK on the Pairing Successful message.
You will then return to the EFTPOS Settings screen in Idealpos.
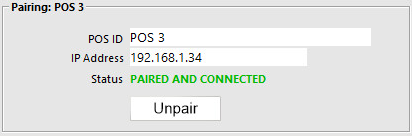
The bottom right corner of the EFTPOS Settings screen should now show that the Pinpad is paired and connected.
You may now close the EFTPOS Settings screen and open the POS screen and proceed to performing EFTPOS transactions using the newly configured Pinpad.
If for some reason Idealpos can’t pair with the Pinpad, a message will displayed on-screen.

Go through the steps again to ensure everything was entered correctly. If there are still any issues, you will need to contact Assembly Payments.
If you need to unpair the pinpad for any reason when attempting the pairing process again, refer to the page Unpairing the Westpac Group pinpad from Idealpos for more details.